1
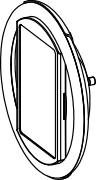
HALO body
At the top of the case. Set it somewhere safe.
2
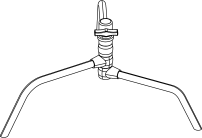
Stand legs
Just below the body.
3

Stand riser
At the bottom of the case.
4
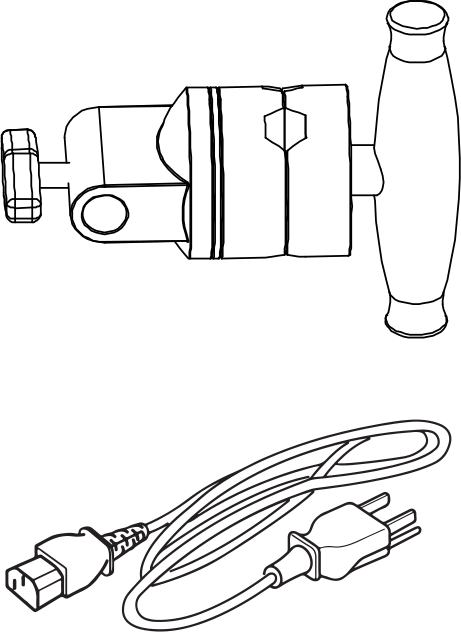
Grip head
The grip head and charger are both in the side compartments.
Everything you need to set up your booth and go live, from unboxing to your first photo.
Event Kit setup. Your HALO travels in a custom case with a portable stand. Assemble it, launch the software, and you're ready to capture. When the event's over, see Repacking your case at the end.
Install Kit setup. Your HALO mounts to a wall for a permanent spot. Hang the mount, attach the HALO, launch the software, and you're live.
The travel case is custom-cut to hold each part snugly. Here's what you'll find, top to bottom.

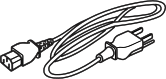
You'll also need fasteners. Because we don't know your wall type, fasteners aren't included. Pick them up at most hardware stores using the guide below, and always follow the instructions that come with your fasteners.
| Surface | Into wood studs | Into metal studs / anchors |
|---|---|---|
| Drywall | #10 wood screws, 1¼" or longer | #10 toggle bolts, 1¼", rated 50+ lbs |
| Plaster | #10 wood screws, 2" or longer | #10 toggle bolts, 2", rated 50+ lbs |
| Masonry | Any 3/16" x 1¼" masonry anchor (rated for hundreds of lbs). A hammer drill makes it easier. | |
Mounting to something else? Research your surface type and choose fasteners rated for 50+ lbs. When mounting to drywall or plaster, always find and use a stud, with anchors for the other half of the mount.

Prefer to watch? See the full HALO setup video.
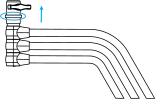
Pull up on the ring marked in green on the base.
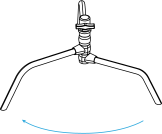
Tilt or pull each leg out. Each one stops automatically when it reaches the right spot.
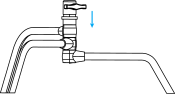
Release the lock so its grooves sit flush with the base.
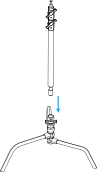
Place the riser in the base and secure it with the bottom knob.
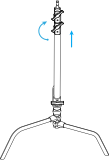
Extend it and tighten the knobs. We recommend about 5 feet (1.5 m) off the ground.
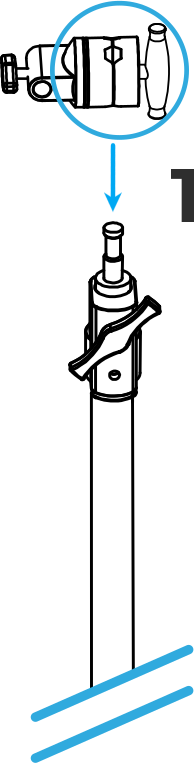
The clamp (1) attaches to the top of the stand. Loosen its handle just enough to slide it on, then position the smaller side so the round receptacle is horizontal, not vertical.
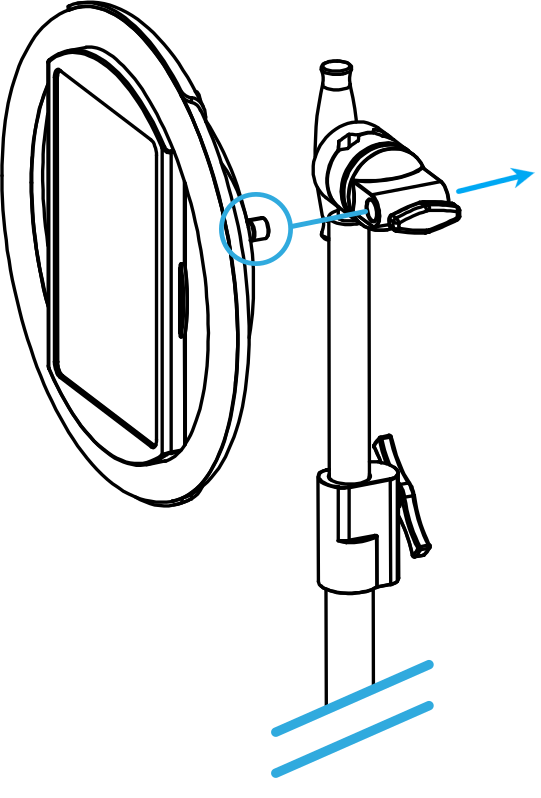
Insert the silver pin on the back of the HALO into the round receptacle until it is no longer visible. Tighten the small handle, and loosen it slightly anytime to adjust the angle.
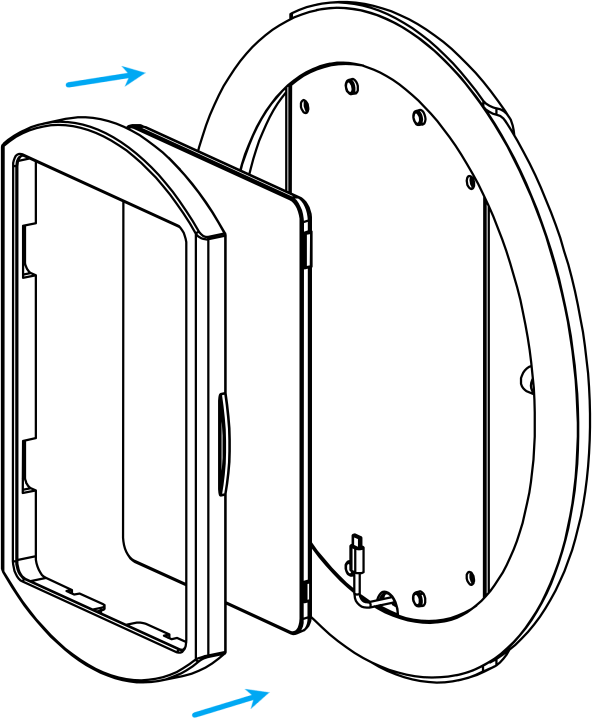
Pull the faceplate off using the side tabs near the top, then rotate the interior swivel tabs fully behind the iPad to secure it. That keeps the camera’s view clear.
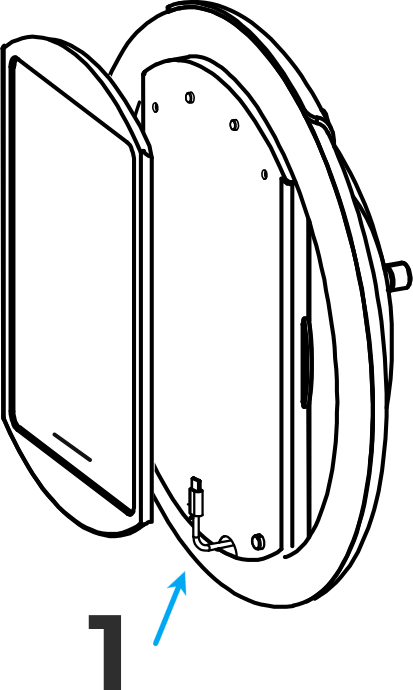
Hold the bottom of the enclosed iPad near the bottom of the HALO body and plug in the USB-C connector (1). Then align the faceplate and let the magnets snap it into position, making sure the USB-C cable isn’t caught underneath.
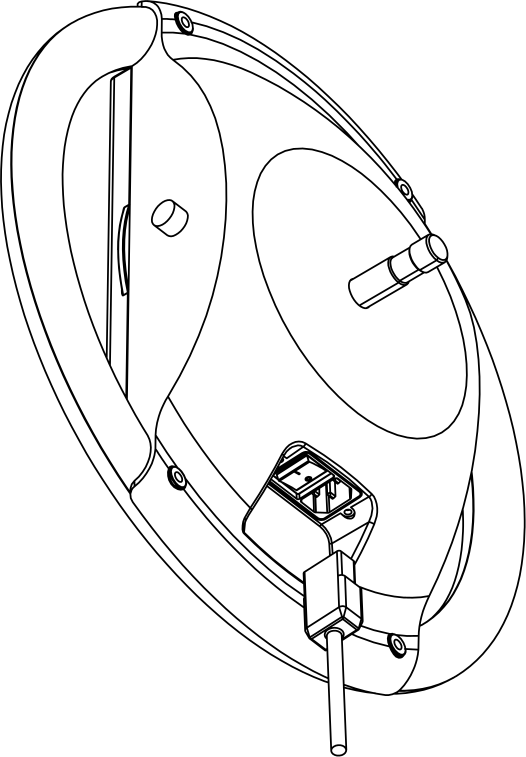
Insert the power cord into the bottom-back of the HALO body and flip the switch beside it. The iPad starts charging right away.
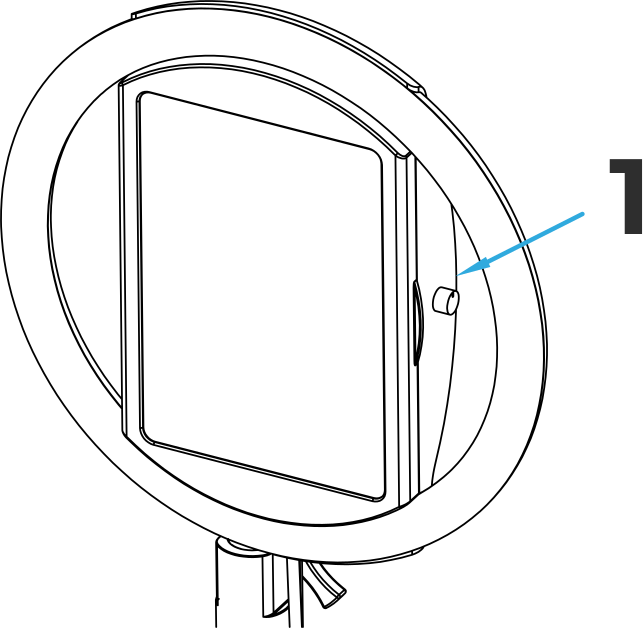
Set HALO's brightness with the side knob (1), then fine-tune exposure and other camera settings in the app's Mission Control.
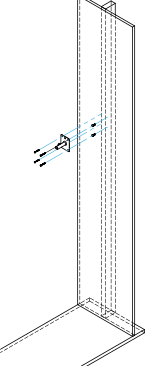
Use the wall mount plate to mark your fastener positions. We recommend about 5 feet (1.5 m) high.
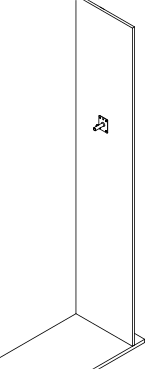
Hang the mount following your fasteners' instructions. Make sure it's fully tightened and secure.
The cord goes into the back of the HALO, so plug it in before mounting.
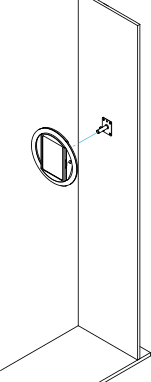
Guide the silver pin on the back of the HALO into the wall mount's receptacle until it is no longer visible.
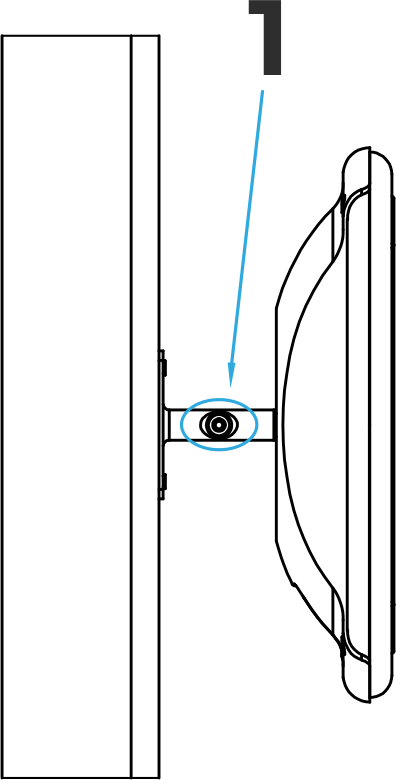
Lock the equipment in place using the wall mount's securing screw (1).
Pull the faceplate off using the side tabs near the top, then rotate the interior swivel tabs fully behind the iPad to secure it. That keeps the camera’s view clear.
Hold the bottom of the enclosed iPad near the bottom of the HALO body and plug in the USB-C connector (1). Then align the faceplate and let the magnets snap it into position, making sure the USB-C cable isn’t caught underneath.
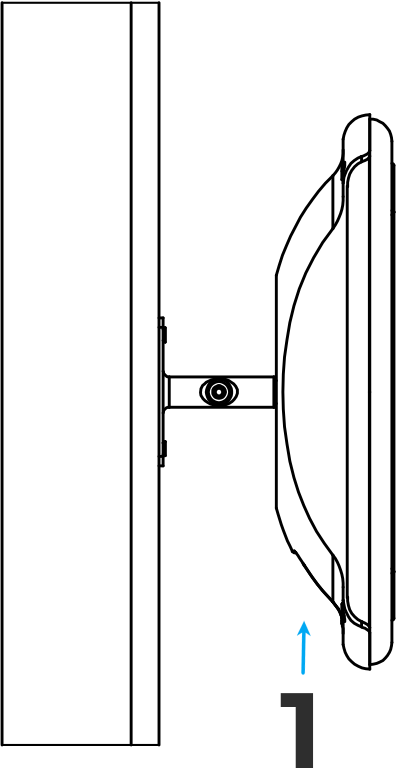
Plug the power cord into the wall and flip the bottom-back switch (1) to power on.
Set HALO's brightness with the side knob (1), then fine-tune exposure and other camera settings in the app's Mission Control.

Download the app. Scan this code, or search Simple Booth HALO in the App Store, to install it on your iPad.
 on your iPad, the same app you just downloaded.
A few things to do first.
A hidden dashboard for quick checks while the booth is running.

Want the full picture? Scan for the complete Simple Booth onboarding guide, with account setup, iPad prep, best practices, and troubleshooting.
Close the app so it starts fresh next time: swipe up from the bottom of the screen, then swipe the Simple Booth HALO app away. Lock the iPad screen when you're done.
Keep the iPad in the faceplate. Leaving the iPad secured in the faceplate is a safe, protected way to transport it.
The foam is cut to hold everything securely in transit, so pack in this order.
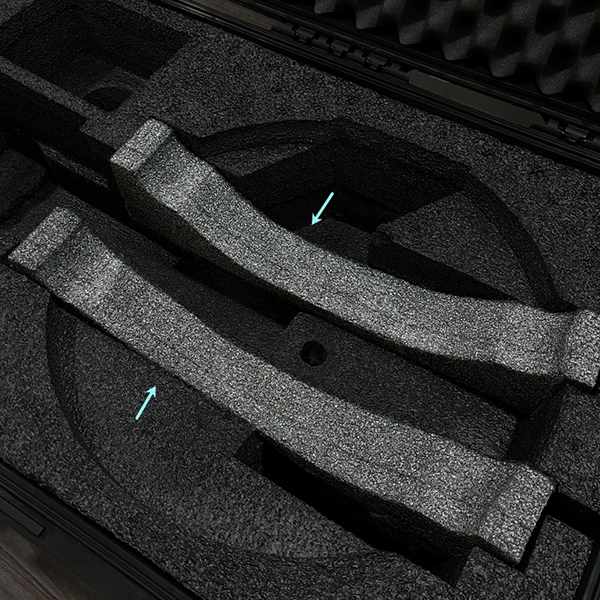
They cradle the HALO.
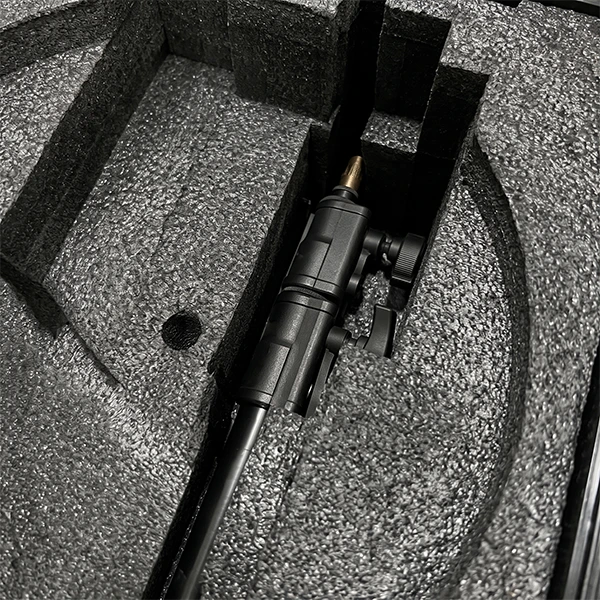
There's a pocket cut out for the knobs.
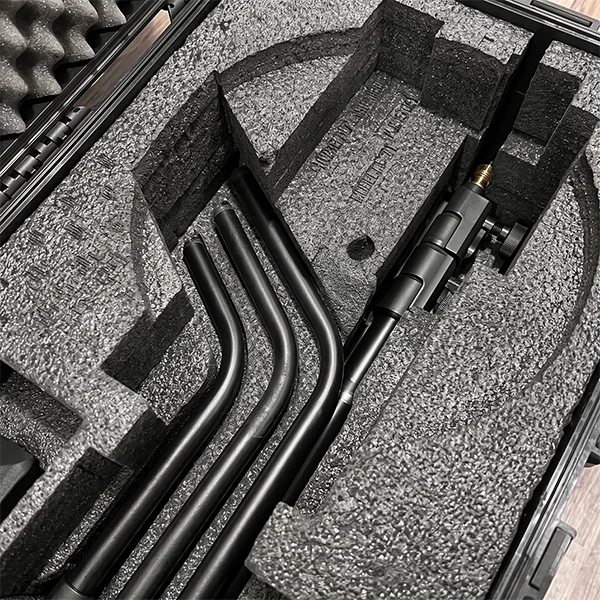
You may need to flip or rotate them to fit.
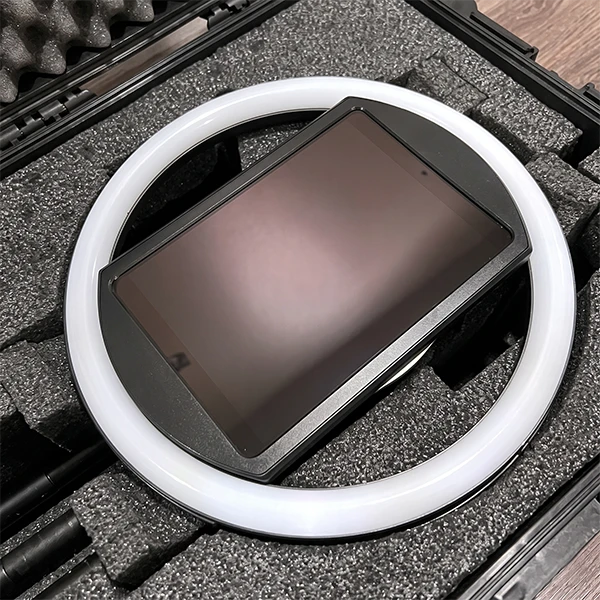
There's a hole cut out for the silver pin on the back.